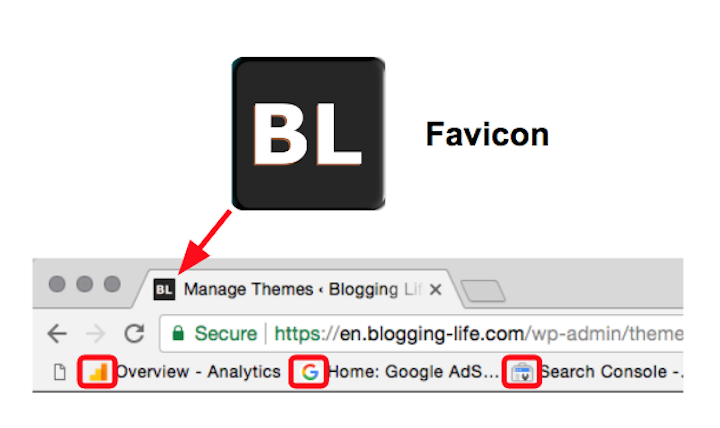
Favicon is a tiny image that appears on the browser tab, bookmark bar, address bar and some other places such as Search Console. It is also called site icon. Favicon and site icon help to build branding image. It also provides your site identity. Almost all popular sites have favicon image on their sites.
![]()
In this article, we will show you how to add favicon to your WordPress site. It is really easy!
Favicon file format and size
Almost all latest browsers support for the favicon with the image file formats such as ICO, PNG, GIF, and JPEG. Favicon file sizes can be 16×16, 32×32, or 64×64 pixels, and 8-bit, 24-bit, or 32-bit in color depth.
To add favicon to your website, you need to upload image file to the site root directly, and then place <link rel=> tag to specify image files for respective devices, or use 16×16 image in ICO file format.
You can also find the instruction of configuration for apple touch icon on Apple Developer’s website.
Sounds like complicated work?
The good news is that if you use WordPress Version 4.3 or later, it is really easy to add favicon to your WordPress site. WordPress Version 4.3 or later, you don’t need to prepare the favicon.ico file or modify your template file. In the next section, we will show you how to do it.
How to add favicon to your WordPress site
1. Create 512×512 pixel image using photo apps such as Photoshop or logo creator apps.
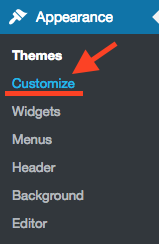
2. From WordPress Dashboard, click “Appearance” and then click “Customize”.
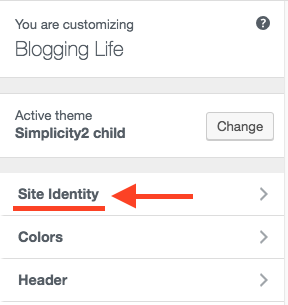
3. Click “Site Identity”
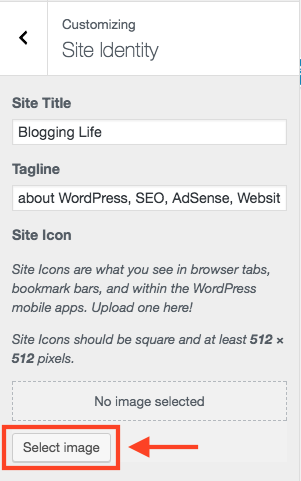
4. Press [Select image] button, and then upload the image. The site icon image should be square and at least 512×512 pixels.
5. After uploaded site icon (favicon) image, it will display favicon preview on Site Identity section. If image looks good, then press [Publish] button.
![]()
That’s it!


Comments