
Operating website, you might get spam emails. Instead of posting your email address in your website profile, adding contact form reduces the chance of getting spam and get more effective communication with users through contact form.
If you use WordPress, it is easy to add contact form to your site by using plugin.
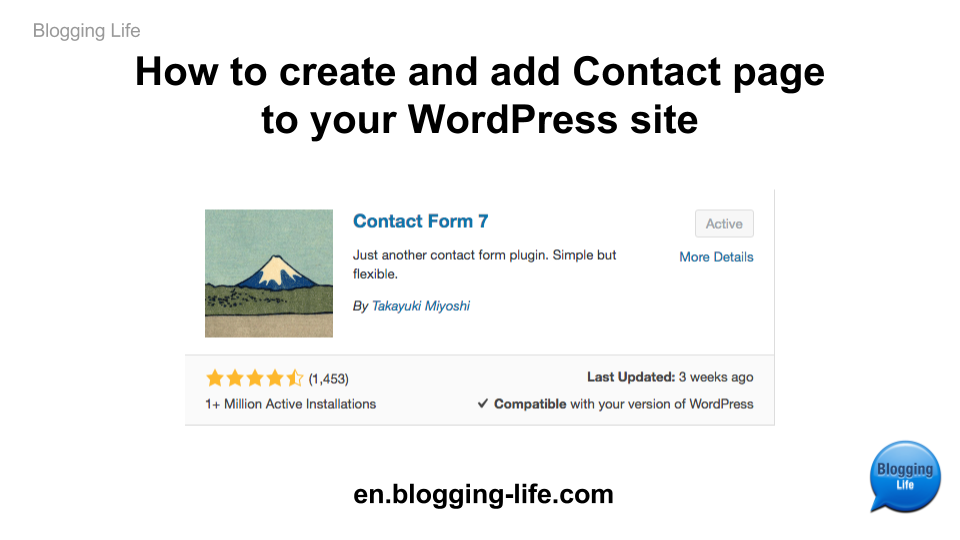
Contact Form 7 is one of the most popular WordPress plugins to make a contact form. For further spam protection, Contact Form 7 supports reCAPTCHA integration as an optional feature. reCAPTCHA is very effective to prevent your site from spam.
In this article, we will show you how to add reCAPTCHA to Contact Form 7.
What is reCAPTCHA?
reCAPTCHA is a free service that protects your website from spam and abuse. reCAPTCHA uses an advanced risk analysis engine and adaptive CAPTCHAs to keep automated software from engaging in abusive activities on your site. It does this while letting your valid users pass through with ease.
Here is a short YouTube video for reCAPTCHA introduction.
Currently, there are two types of reCAPTCHA available for websites.They are reCAPTCHA 2nd (V2) and 3rd generation (Invisible).
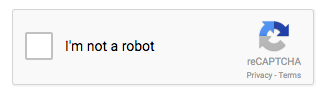
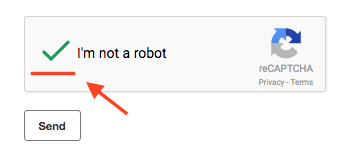
The following is a reCAPTCHA V2 badge to validate users by clicking the “I’m not a robot” checkbox.
If you are interested in enabling Invisible reCAPTCHA for Contact Form, please visit “How to add Invisible reCAPTCHA to your WordPress site” post.
How to integrate reCAPTCHA in Contact Form 7
In order to use reCAPTCHA on your site, you need to register your site at Google reCAPTCHA site. After registration, you will be able to get reCAPTCHA keys for your site.
Register a site for reCAPTCHA
Go to Google reCAPTCHA home page, and press “Get reCAPTCHA” button. (Log in Google account if you have not logged in.)

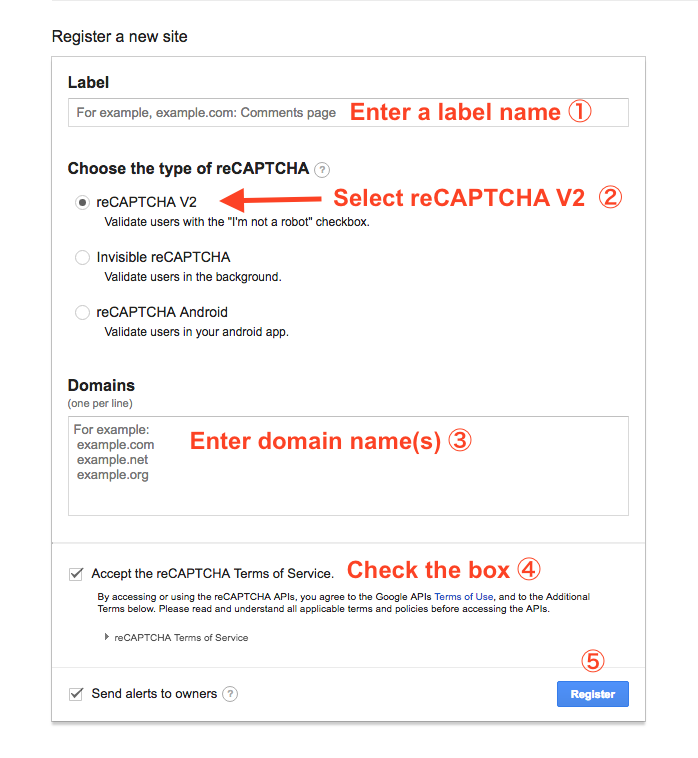
Fill out registration form.
- Enter a label name(①)
- Select reCAPTCHA V2(②)
- Enter domain name(s) (③)
- Check to accept the reCAPTCHA terms of Service(④)
- Push “Register” button(⑤)
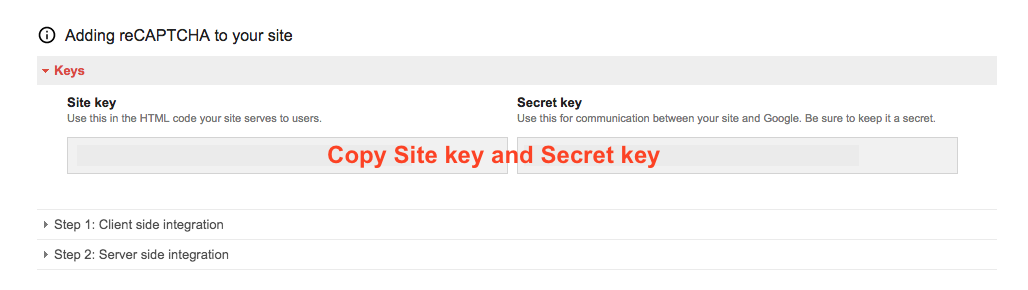
Get and copy Site key and Secret key
After registration, reCAPTCHA information for the site integration will be displayed. You will need Site key and Secret key to install reCAPTCHA in your site. These keys are your site specific information. Copy them.
Integrate reCAPTCHA V2 with Contact Form 7
If you have not created contact page, please create the contact page using Contact Form 7 first.
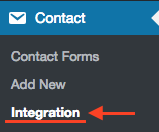
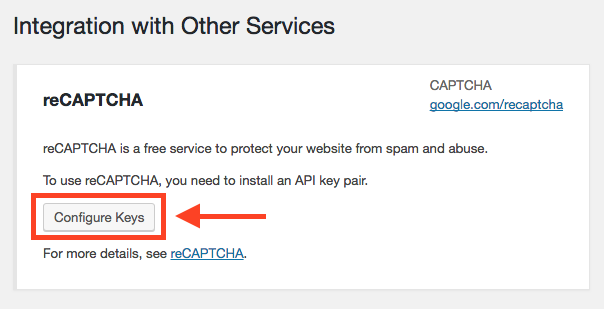
From WordPress Dashboard, click “Contact” and then select “Integration”.
Click “Configuration Keys” button.
Paste your site specific Site key and Secret key from reCAPTCHA page after registration of your site.
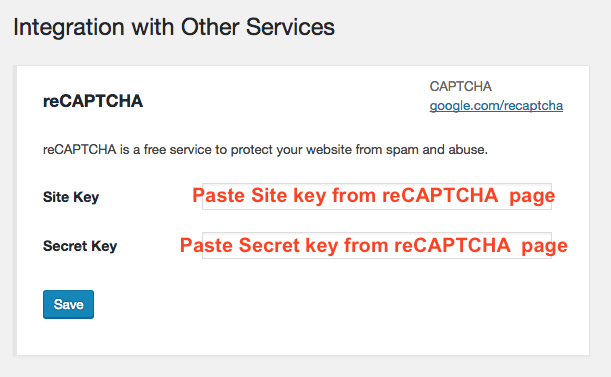
Press “Save” button.
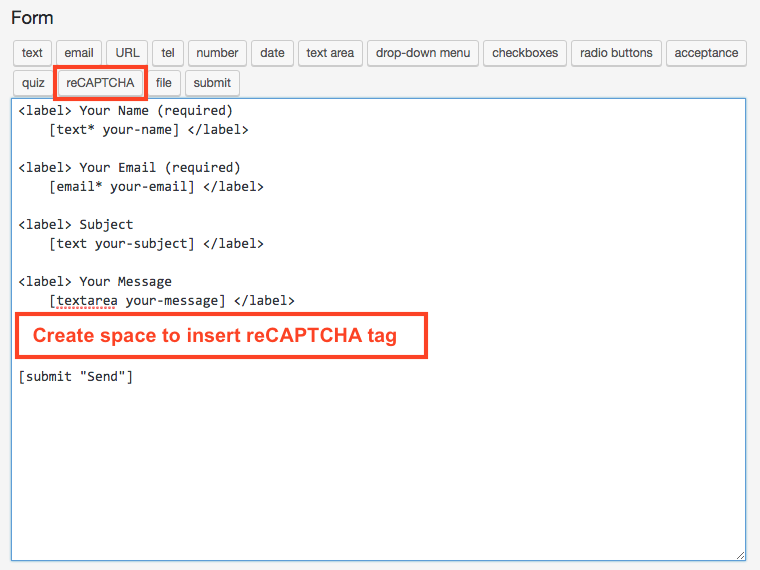
Insert reCAPTCHA tag in the contact form
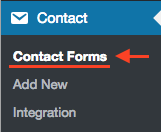
From WordPress Dashboard, click “Contact” and then select “Integration”.
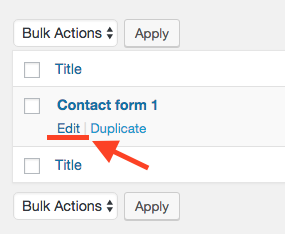
Click “Edit” in the contact form that you would like to add reCAPTCHA.
Contact Form edit page is displayed. Create space for reCAPTCHA tag, and then click “reCAPCHA” button.
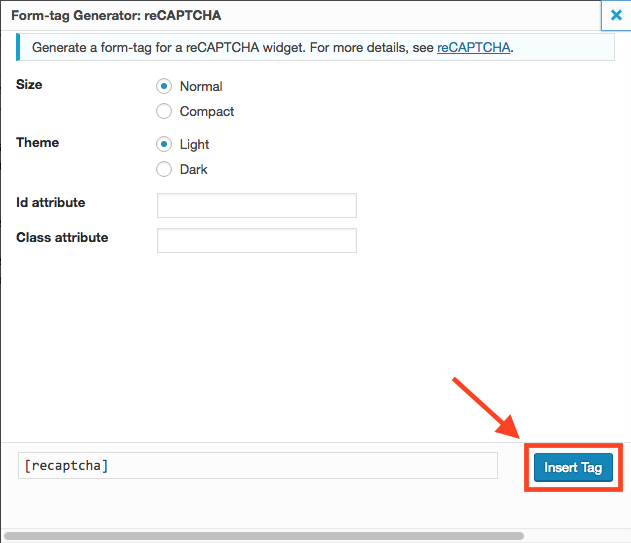
reCAPTCHA tag generation window is displayed. You can choose size and theme tone (Light or Dark), and can add ID and Class attribute as option if you like.
Press “Insert Tag” button.
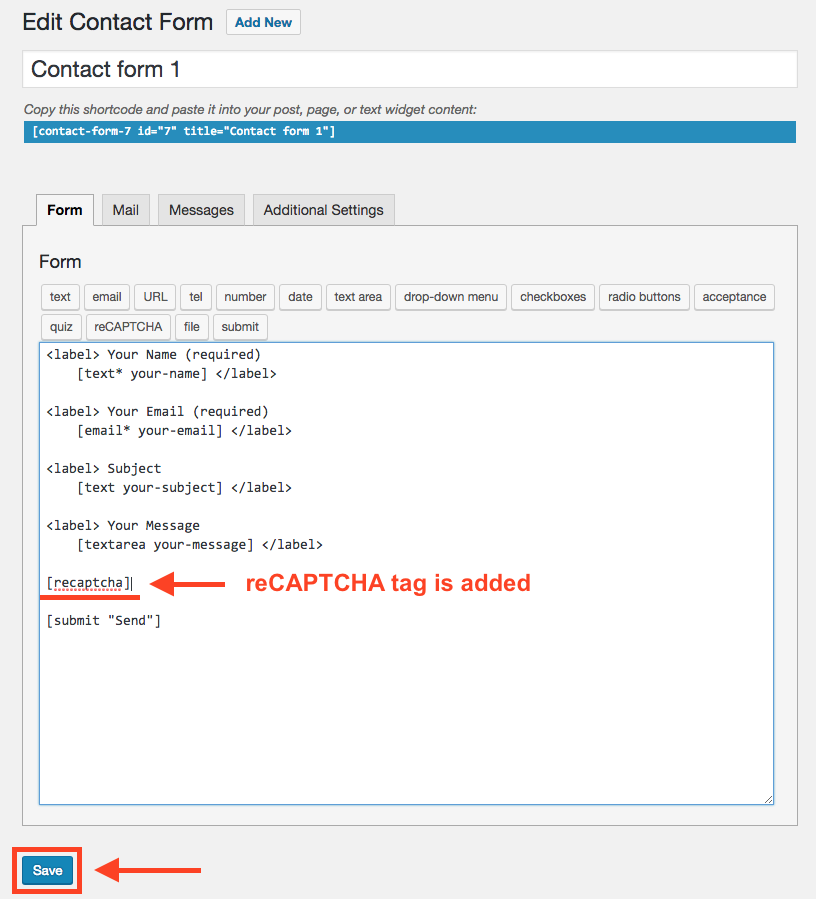
reCAPTCHA tag is added to the form. Press “Save” button.
The reCAPTCHA integration setting is completed!
Check contact form for reCAPTCHA integration
Visit your site, and go to “Contact Form” page to check reCAPTCHA integration is completed successfully.
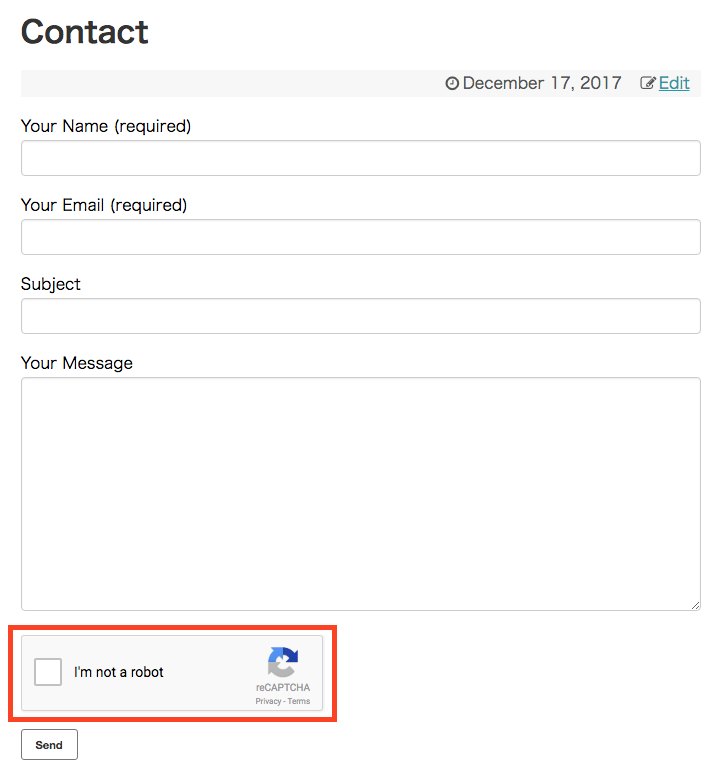
If you see the reCAPTCHA box, the integration work is (almost) completed. You can double-check to see by trying to send a test message.
If you unchecked the box next to “I’m not a robot” and press “send” button, the message, “Please verify that you are not a robot” will be displayed as below image.

When you check the “I’m not a robot” box, you might get a simple validation test. After verification completed, the green checkmark is shown.
Now, you can send a message! You can confirm reCAPTCHA is now working on your site.
Cheers!

Comments