Twitter offers timeline widget that can embed Tweets on your website. Display the latest tweets from your Twitter account. The embedded timelines are interactive, and is a great engagement tool with your site visitors.
This article is to show you how to embed Twitter timeline on WordPress site.
Create Twitter Timeline Widget
1. Log in your Twitter account
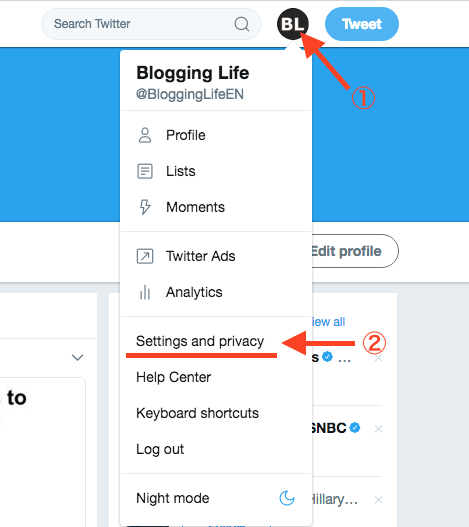
2. Click profile icon on top right, next to Tweet button (①)
3. Select [Settings and privacy] from dropdown item list(②)
From Account setting menu, click [Widgets]
![Select [Widgets] from Account setting menu items](https://en.blogging-life.com/wp-content/uploads/2017/12/Select-Widgets-from-Account-setting-menu.png)
Press [Create new] button.
![Press [Create New] button](https://en.blogging-life.com/wp-content/uploads/2017/12/Push-Create-New-button.png)
There are 5 types of Widgets available, Profile, Likes, List, Collection, and Search. Choose [Profile] for Twitter timelines.

On the next screen, you will be asked to enter URL. If you would like to embed your account Timelines, enter your Twitter account URL. (e.g. https://twitter.com/accountname )

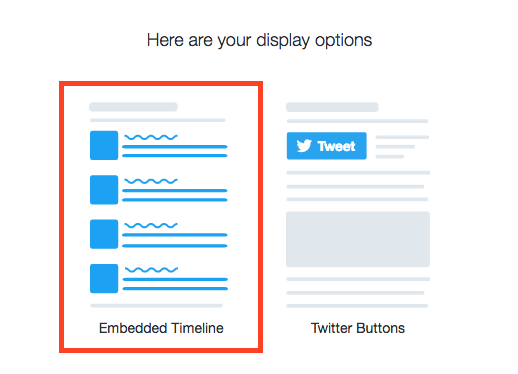
You will be asked to choose display options. One is Embedded Timelines, and the other is Twitter Buttons. In this example, we will choose Embedded Timelines.
Now, the timeline widget is created! If you would like to customize widget, click the link. Otherwise, press [Copy Code] button.

If you click “set customization options”, the following options will be displayed. You can set Height, Width, Tone, Link color, and Language.
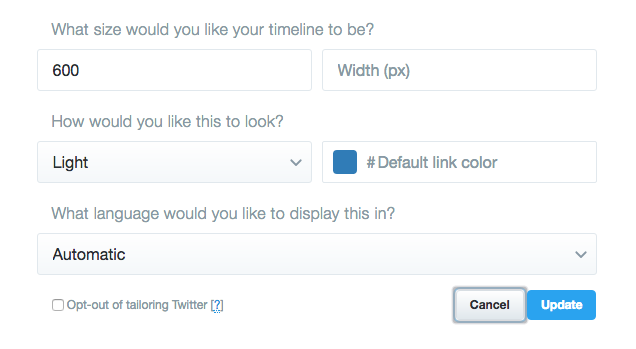
Press [update] button, you will be back to the previous page. Press [Copy Code]

Embed Twitter widget on WordPress site
Go to WordPress admin page to paste the Twitter widget code into WordPress widget.
1. Click [Widgets] from Appearance in WordPress Dashboard menu
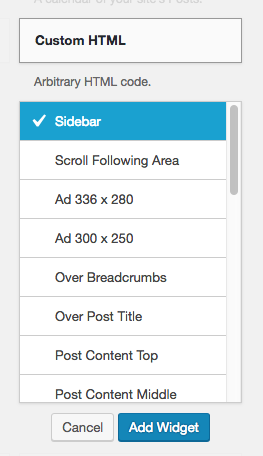
2. Press [Custom HTML]
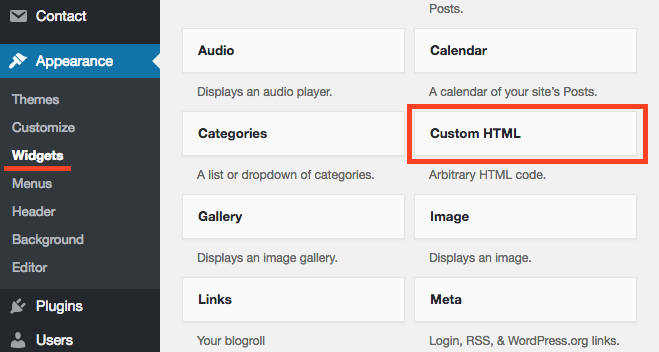
3. Choose “Sidebar”, and then press [Add Widget] button.
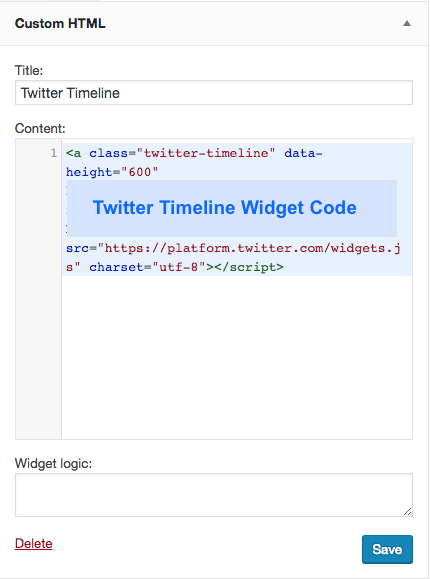
4. Past Twitter Timeline widget code into Custom HTML widget. Press [Save] button.
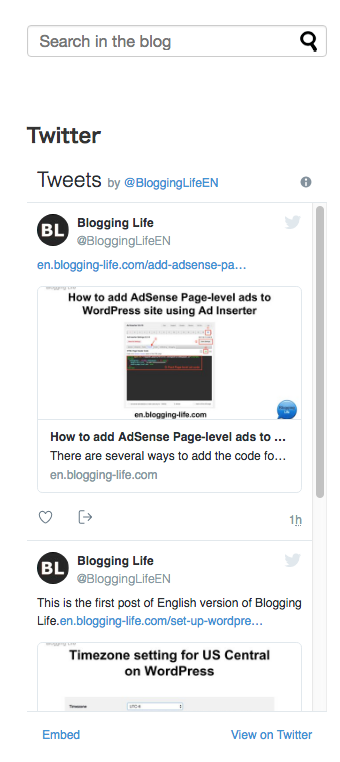
5. Visit your site to check the Twitter Timeline is showing on the sidebar
That’s it.


Comments