There are several ways to add the code for AdSense Page-level ads to WordPress site. In this article, we will show you how to insert AdSense Page-level ads in the <head> tag of your site using WordPress Ad Inserter Plugin.
Table of Contents
Install Ad Inserter to your WordPress site
- From WordPress Dashboard, click [Plugins] and then click [Add New]
- Enter “Ad Inserter” in plugin search box
- Click [Install Now] on Ad Inserter, and activate.

Get and copy Page-level ad code
1. Log in your AdSense account
2. Click [My ads], and then click [Page-level ads]
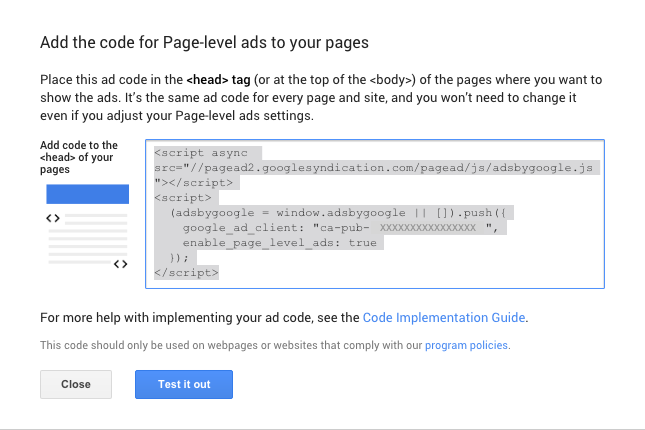
3. Click [< > Get code] button
 Small window will be displayed. Select and copy the code.
Insert AdSense Page-level ads in the <head> tag of your site
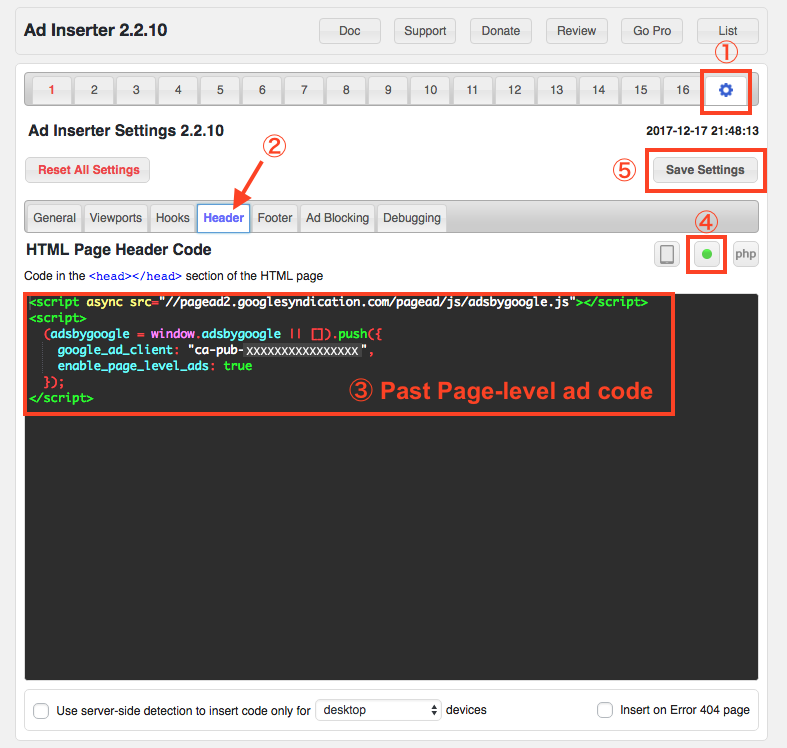
- From WordPress Dashboard, click [Settings] and then click [Ad Inserter].
- Click gear icon on the right top (① on the image)
- Click [Header] tab (②)
- Paste AdSense Page-level ad code in the ad code block box (③)
- Press the gray small circle button on the right above the ad code box to enable insertion of the code into HTML page header (④)
- Push [Save Settings] button
Check ad code is placed correctly
Test Page-level ads on your site
On a mobile device, visit your page and add #googleads to the end o the URL, and then reload the page. (example: https://www.example.com#googleads )
If the test is working, you are done.
Congratulations!
For more information, please visit “Guide to testing Page-level ads” on AdSense Help.
View the page source of site on browser
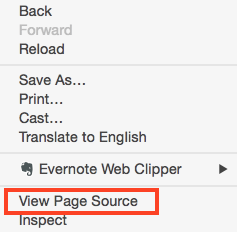
Visit your page on PC, and view the HTML source code. Right click and select “View Page Source”.
Search “</head>”. The Page-level ad code is located near above the closing head tag (</head>: ). If the ad code is located in the <head> tag, it means the code is placed correctly.
Please see the following image as an example. The </head> is underlined and pointed by arrow. The Page-level ad is highlighted as in the red rectangle.

If you see the AdSense Page-level ads code in the <head> tag like image, you are done.
Congratulations!

Comments